ARTIST
Computer Aided Design

Orthographic Drawing


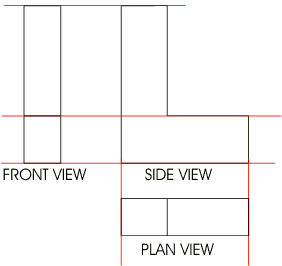
Orthographic drawing is a way of drawing a three dimensional object. In the form of front view, side view and top view.
Definition
Orthographics drawing is defined as a project drawing of which the frontal lines are given in true proportions and relations and all others at suitable angles other than 90 degrees without regard to the rules of linear perspecitives.
Properties
1.Top view is directly over the front view.
2. Side view is inline horizontally with either top view or front view.
3. A line parallel to a plane of projection will be projected on that plane as a line.
4. A surface parallel to a plane of projection will be projected on that plane
5. A line perpendicular to a plane of projection will be projected on that plane as a point.
6. A surface perpendicular to a plane of projection will be projected on that plane a
What are the names of the common views used in orthographic project
A drawing can have any combination of views but the three most common views are:
- front view
- right side view, and
- top view.
Methods of Orthgraphic Drawing
The two methods of projections are:
(a) First angle projections
Method of creating a 2D drawing of a 3D object.
Note the symbol for first angle orthographic projection
example of first angle projection
(b) Third angle projections
Symbol of third angle projection
Third angle projection projects each side of the object outwards in up to six views which are ;
the view from the front is in the middle
the view from the left is on the left
the view from the right is on the right
the view from the top is on the top
the view from the bottom is on the bottom
the view from the rear is on the far right.
in easier way, like this picture;

